I recently saw a recipe for homemade mayo but it was different from all of the other recipes that’s I’ve read and/or used in that it suggested pasteurizing the eggs before making the mayo. Hmmm… I’ve been making homemade, raw egg mayo for the past year and never really thought much about it but let’s face it, I’ve never been sick from raw eggs. I’m sure if you get sick, just once it changes everything.
I was intrigued so I followed the link to the How-To Baker and read her post on “How-to Pasteurize Eggs”. You can follow the link to the original post or you can just keep reading and I’ll tell you how it went for me.
The nice thing is, it’s pretty easy.
- Take the eggs you are going to use for your mayo (I used two) and put them on the counter for about 15 minutes, until they reach room temperature.
- Put the eggs in the bottom of a sauce pan and then fill with cold water, making sure the eggs are covered by about an inch of water.
- Make sure you are committed to hanging out with the eggs, this all goes pretty quickly.
- Put the pan on the stove and cook over medium heat until the water reaches 140 – 150 degrees. If you don’t have a termometer, the How-To Baker suggests that 150 degrees is right about when bubbles start to form on the bottom of the pot. I did this twice, first without a thermometer and the second time with. My pot hit 150 degrees about 30 seconds after bubbles started to form.
- Once the water has reached the desired temperature, remove the pot from the heat and let the eggs sit in the water for 3 minutes, then remove.
There you have it. According to the Hot-To Baker your eggs are now pasteurized and any salmonella that was waiting to make you sicker than you’ve ever been is dead.
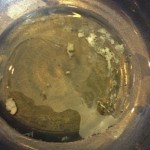
 I read the original post and all of the comments. A lot of commenters mentioned that the clear egg whites turned white during this process, no longer clear. They also mentioned that this didn’t make a bit of difference with how their mayo turned out. The whites of my eggs turned a little bit white but remained mostly clear. My photo isn’t great but you may be able to see the bits of white in the egg white.
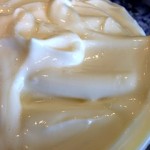
As you can see from the photo of my mayo, it turned out GREAT! Just as yummy as always. I used one whole egg and one yolk. You can read my mayo recipe here.
 By the way, I think I may have mentioned this tip in my recipe for homemade mayo but I’m going to mention it again because it’s a good one. Check the expiration date on your egg carton, that is the same date that your mayo will expire. My mayo doesn’t usually last that long. Once it’s in the fridge that is my cue to enjoy deviled eggs and homemade tuna and chicken salad.
The whole reason I was making mayo was because I wanted to make deviled eggs for a snack. I like having mayo and hard boiled eggs in the fridge so I can whip up a deviled egg when I start to get the munchies.
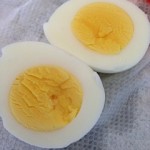
 Making hard boiled eggs seems like a no-brainer but it’s not. I want PERFECT hard boiled eggs. No green yolks or even a hint of green around the yolk. I think I have finally found the perfect recipe for hard boiled eggs. Check out the photo of my egg. Beautiful.
I found the directions for perfect hard boiled eggs over at Nom Nom Paleo. I’ll explain what I did but if you have time you may want to click over to Nom Nom Paleo because she has some good photos, if you like photos.
- I left my eggs on the counter for a little while to let them come to room temperature
- Poke a tiny hole in the bottom (fat part) of each egg you are going to boil. You can use a pin or thumb tack or in my case a thread ripper (worked perfectly and it had a little handle, nice)
- Leave the eggs in the carton while you poke the holes. Push your pointy instrument “just far enough to pierce the shell” (Nom Nom Paleo)
- Once all the the holes have been made place your eggs in the bottom of your sauce pan.
- Fill the sauce pan with water, making sure there is at least an inch of water above the eggs
- Place pot on stove and turn the heat to high.
- When water comes to a rolling boil, time for 1 minute and then remove the pot from the heat
- Put a cover on the pot and let the eggs sit in the water for 10 minutes.
- As soon as your timer goes off remove the eggs and place them in a bowl filled with cold water and ice cubes.
- Let the eggs sit in the icy water for 5 minutes. Nom Nom Paleo says the eggs should still be a little warm when you remove them from the icy water. Mine weren’t and they were hard to peel.
- If the eggs aren’t completely cool (like mine were) the shells should come right off – start peeling from the bottom where the little hole is. Peel all of the eggs.
- Nom Nom Paleo says you can store the peeled, hard boiled eggs in the fridge for up to a week in a sealed container. I don’t like to store them for very long so I just make a few at a time so they get eaten within a day or two.
If you have avoided making homemade mayo because of the fear of raw eggs hopefully the above information will give you the confidence to give it a try. It is so worth it. It will be the best mayo you have ever tasted!
Eat Well, Feel Good, Have Fun!

I’m Amy a board certified holistic nutritionist, certified functional nutritionist and lifestyle practitioner and certified Life Coach. I help women in midlife understand the changing needs of their body so that they can stop dieting and lose weight permanently. At 56 I live what I teach. Don’t believe the story that your best years are behind you. They are not. Your best years are just starting!
